> ## Documentation Index
> Fetch the complete documentation index at: https://docs.powerux.app/llms.txt
> Use this file to discover all available pages before exploring further.
# Command Bar
> Command bar flows are designed to prepare a script generated from the maker configurations to be added by the maker to the command they designed using the command bar designer in PowerApps or using any community tools such as RibbonWorkBench.
The current version only supports ribbon for Form command bards
## Creating a command bar flow
1. From Flows click on New 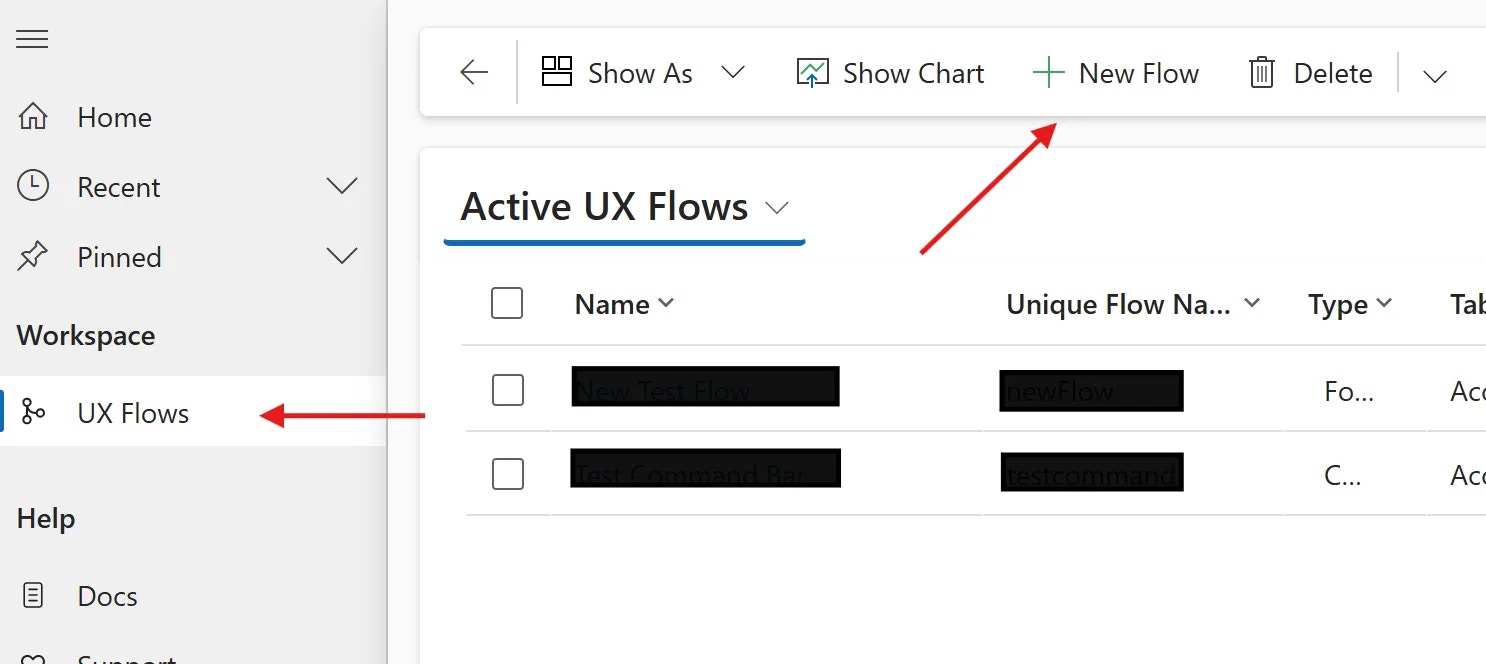 2. Choose the “Command bar (Ribbon)” option
 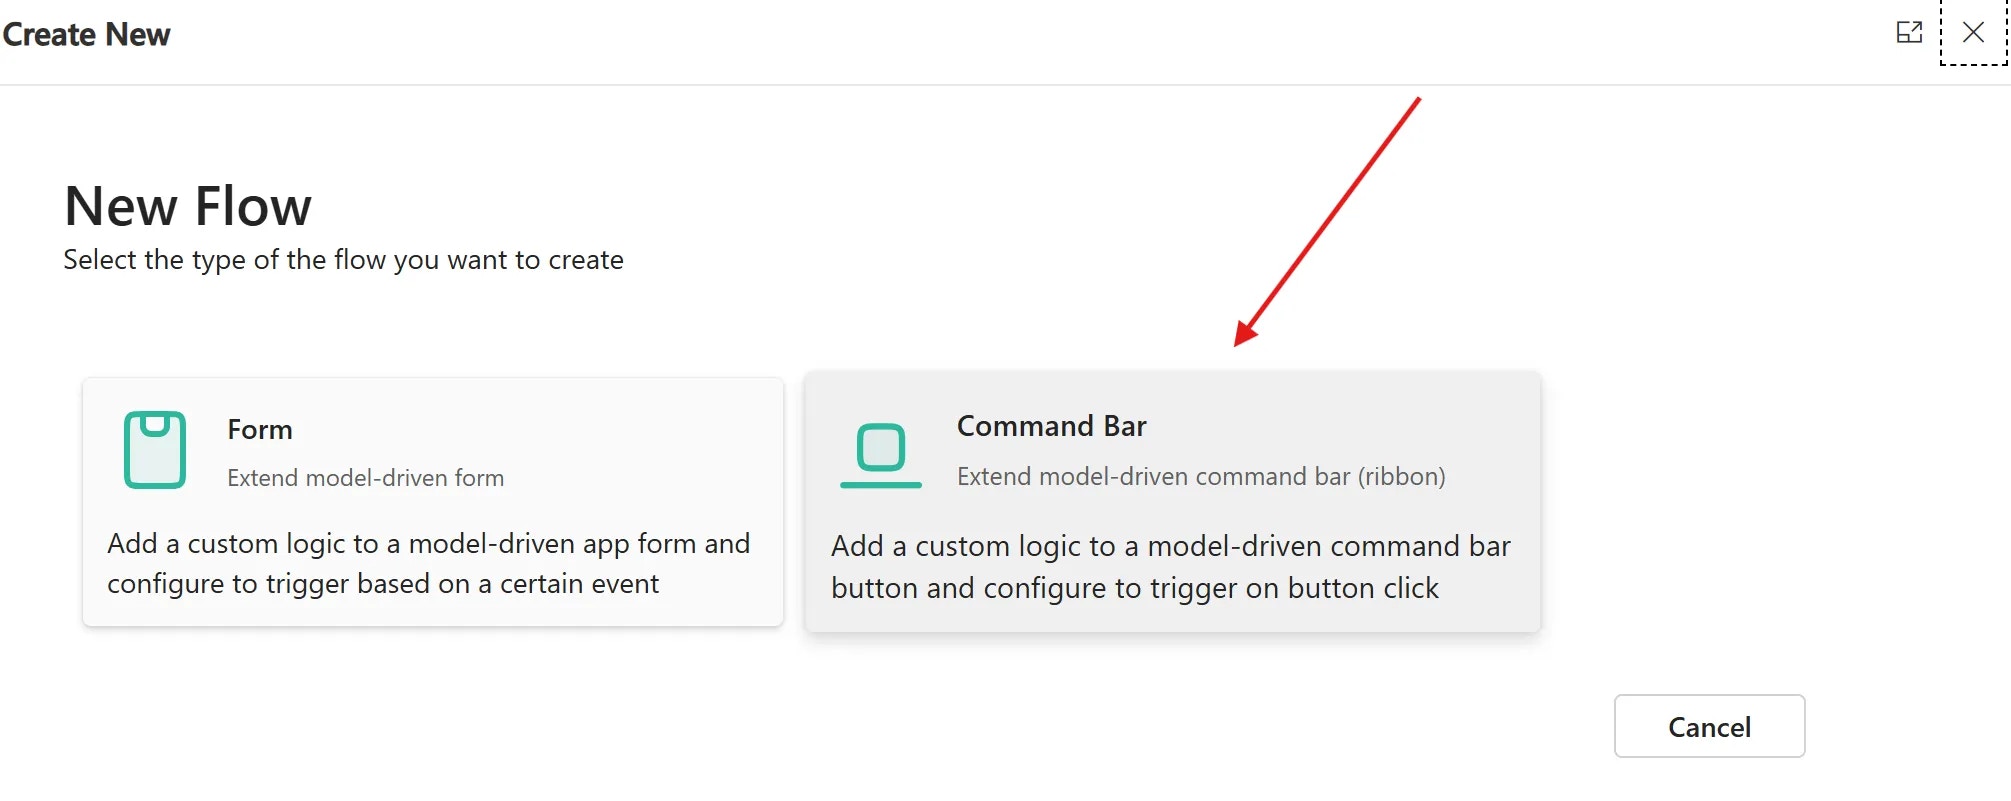 3. Set a name for the flow and then choose a table and a form for the command bar you want to extend.
 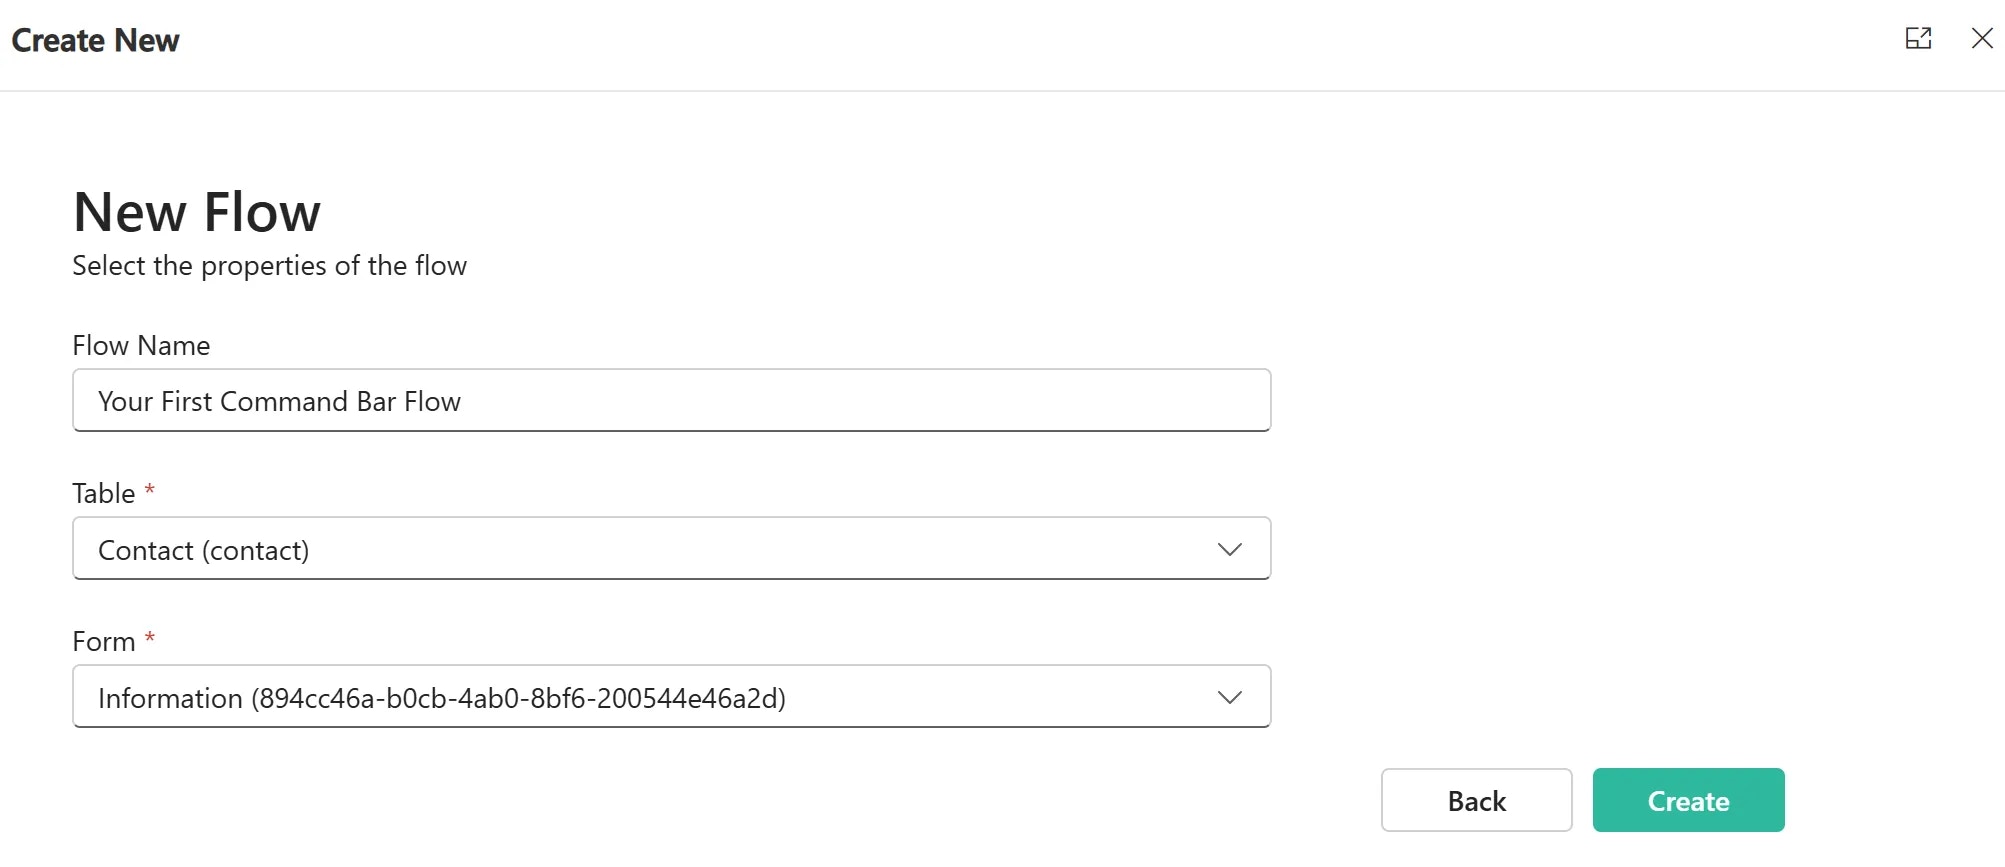 4. Click on Create
## Edit your flow
1. Click on the Edit button
4. Click on Create
## Edit your flow
1. Click on the Edit button 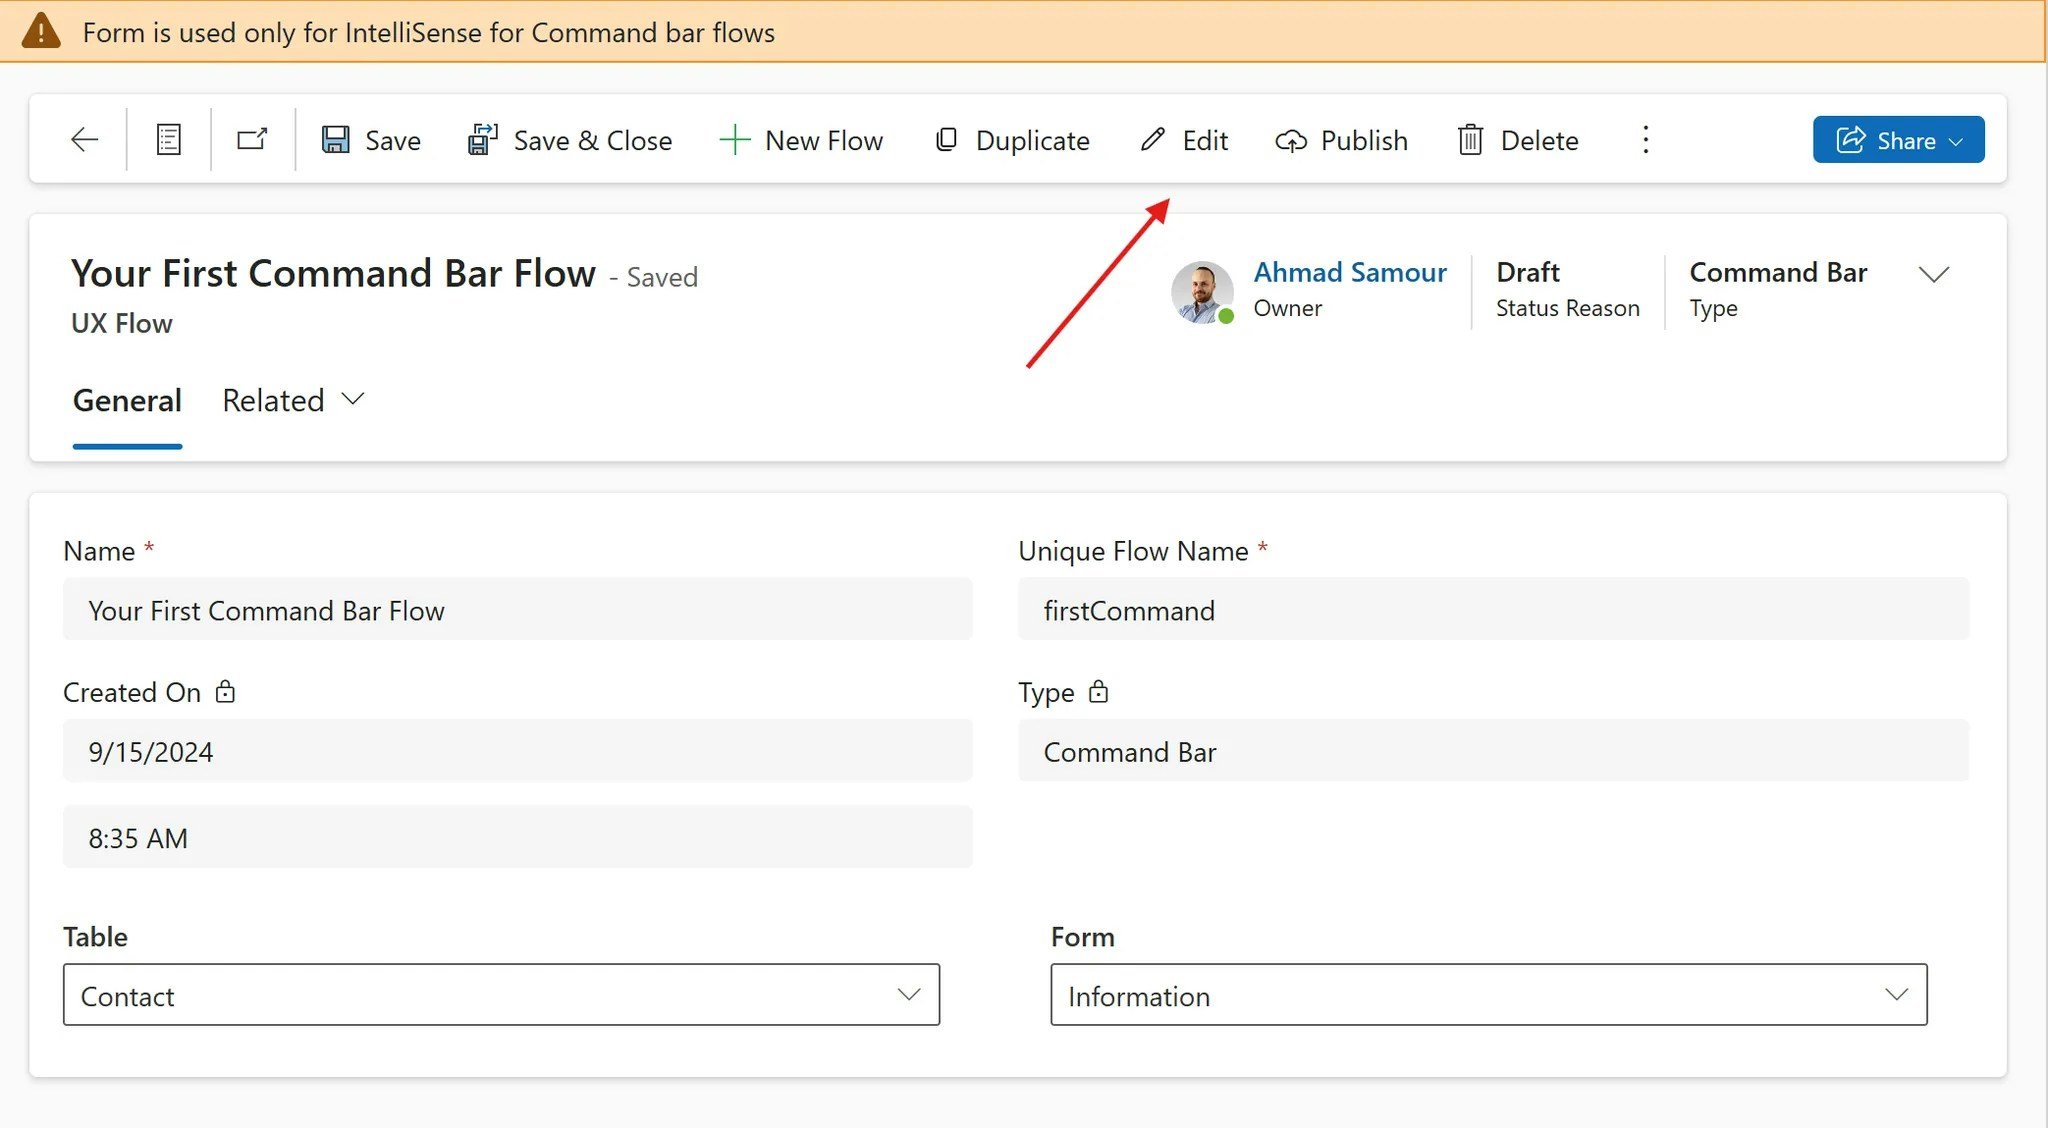 2. Configure your flow logic
3. Publish your Flow
## Use your flow in a Command
1. Copy the details of your published flow
2. Configure your flow logic
3. Publish your Flow
## Use your flow in a Command
1. Copy the details of your published flow 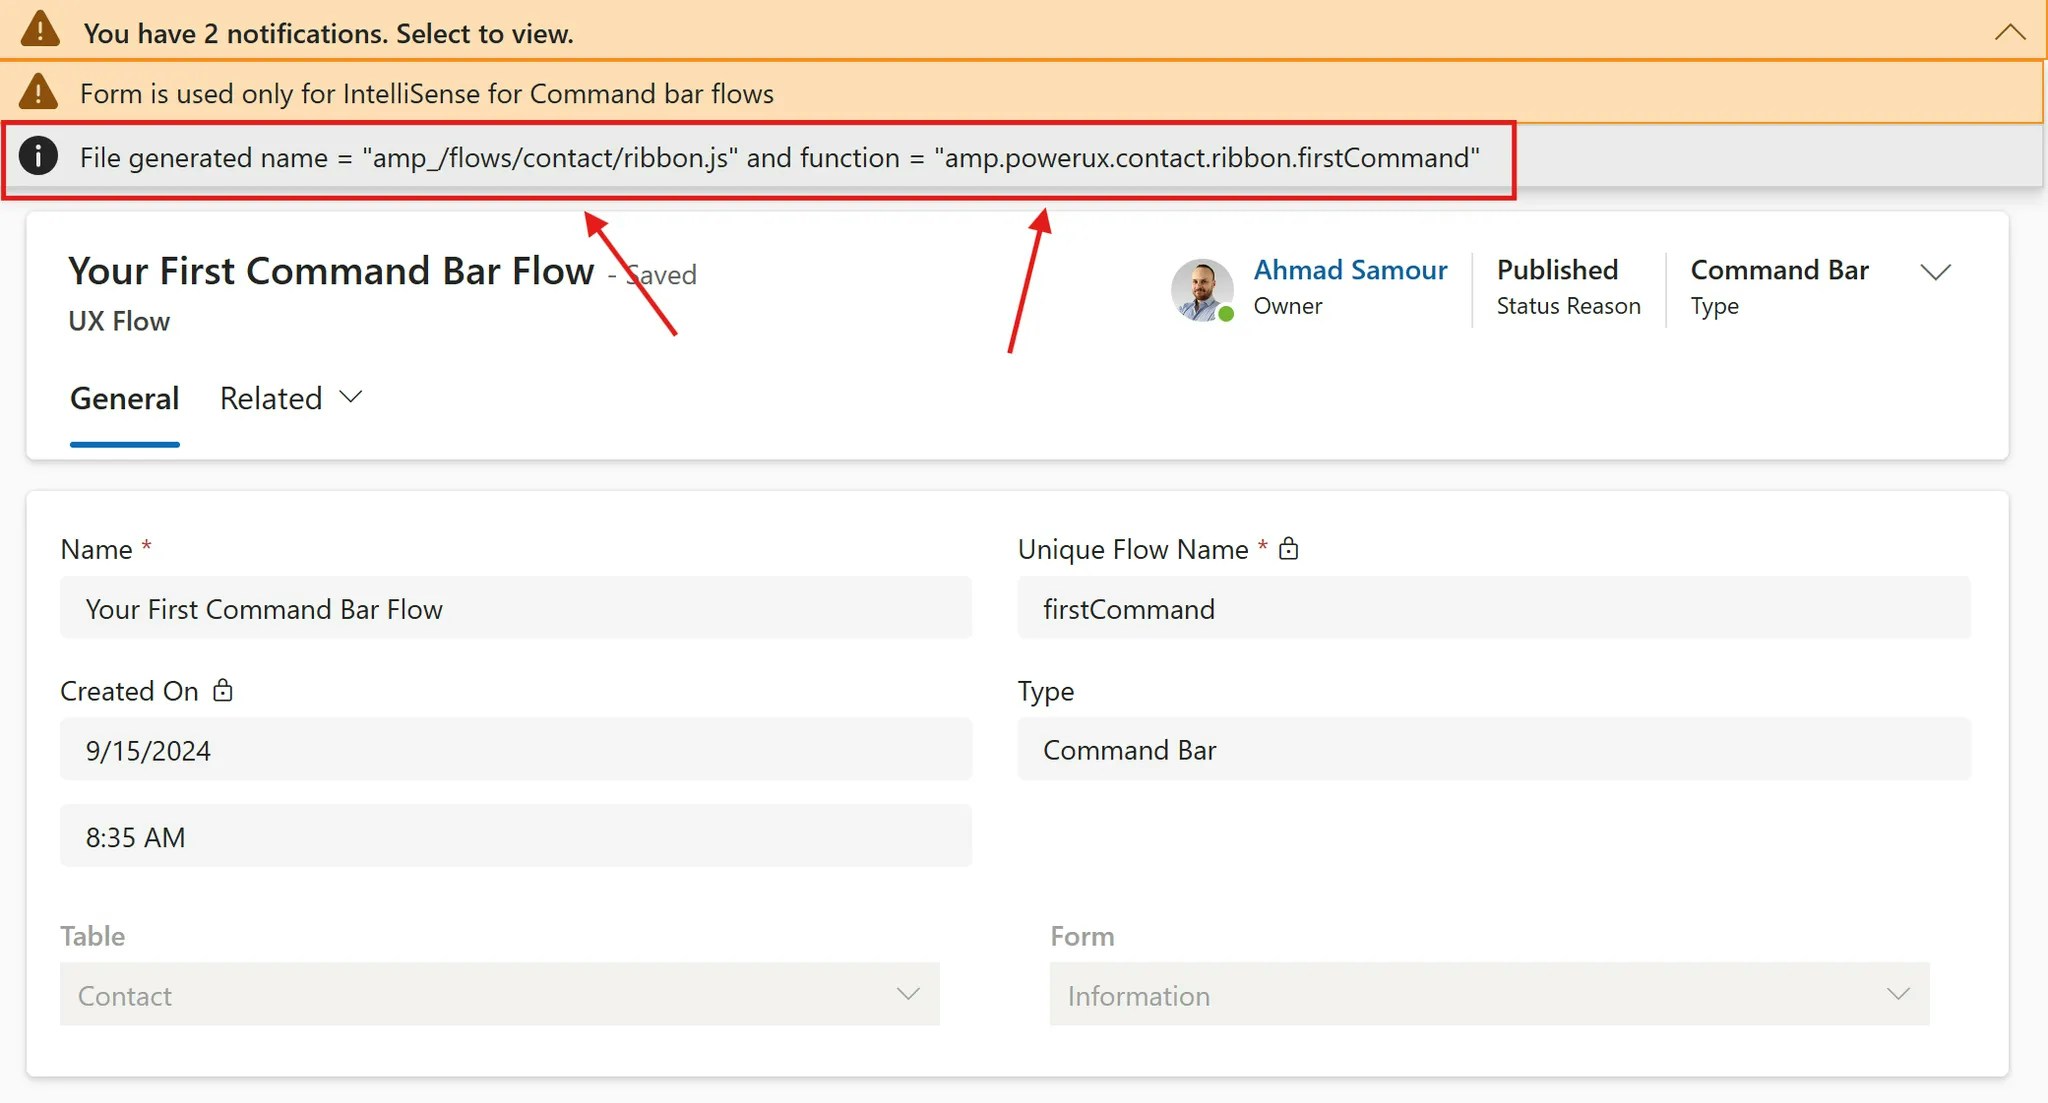 You will get two values:
A. File name
B. Function name
2. Open the Command Bar designer and click Edit Command bar for the entity you want to extend
3. Choose Main form
You will get two values:
A. File name
B. Function name
2. Open the Command Bar designer and click Edit Command bar for the entity you want to extend
3. Choose Main form 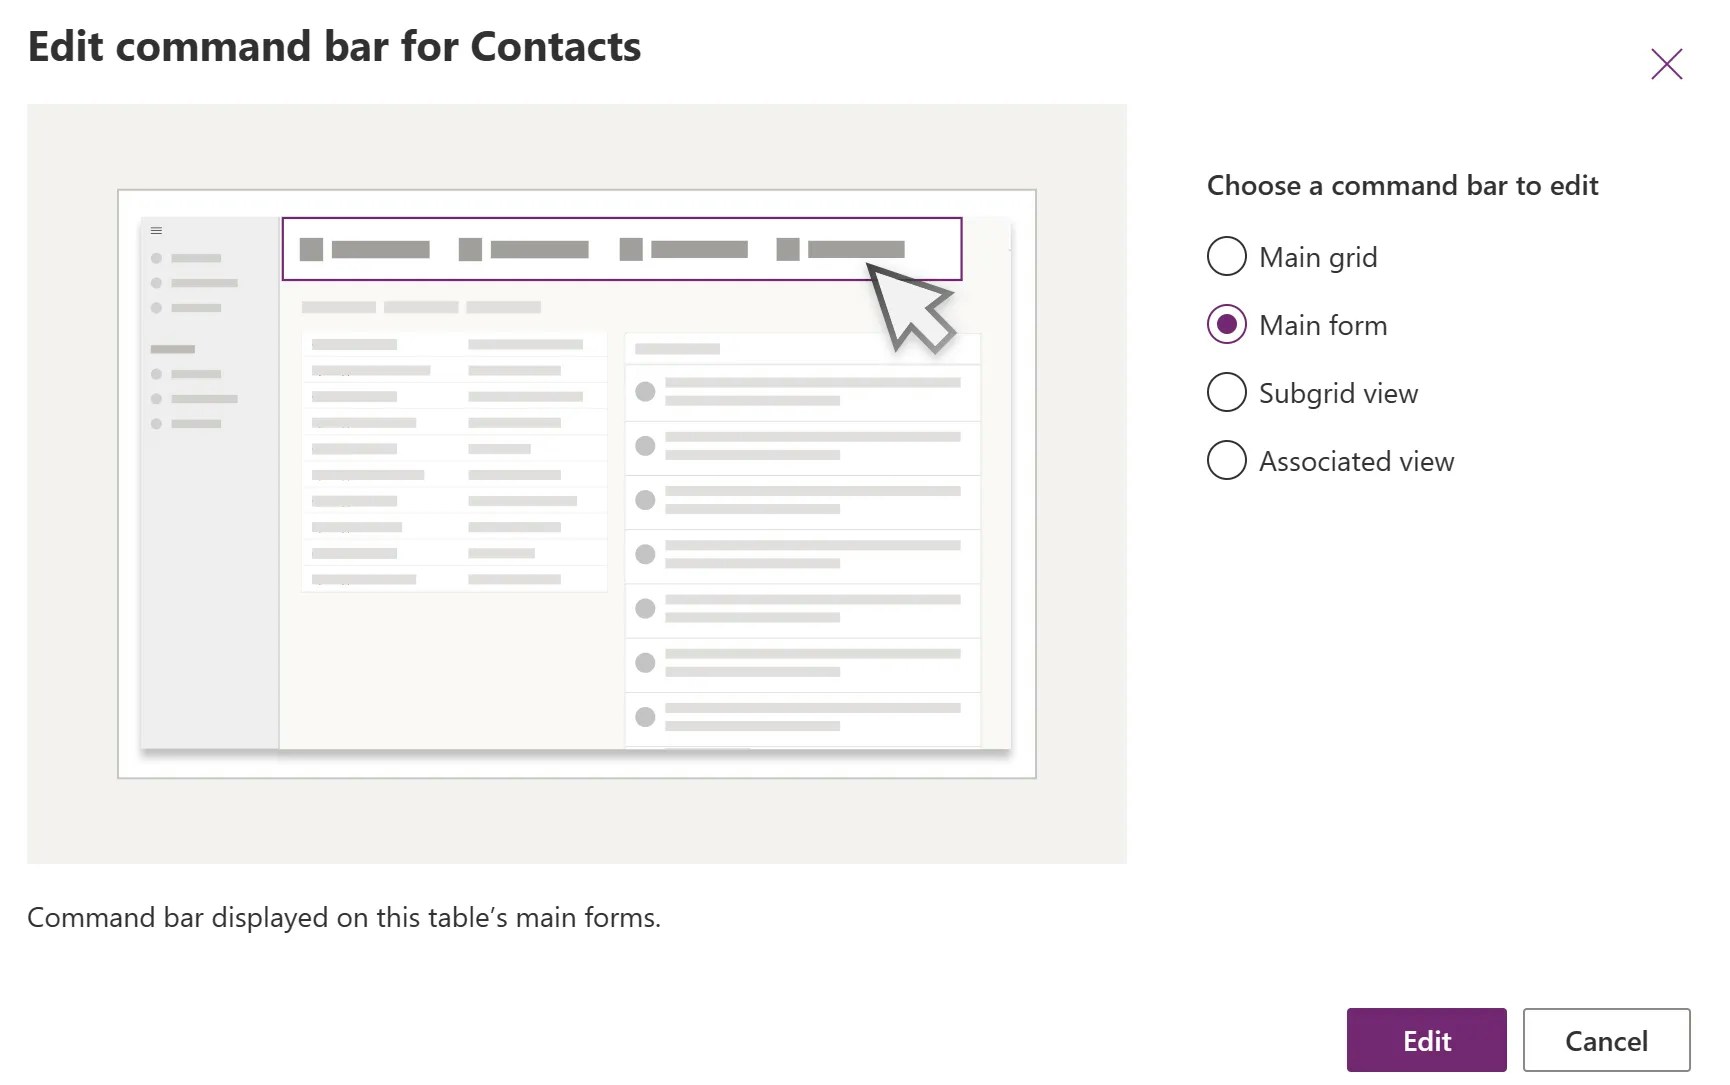 4. Create a new Command and choose type as **JavaScript**
 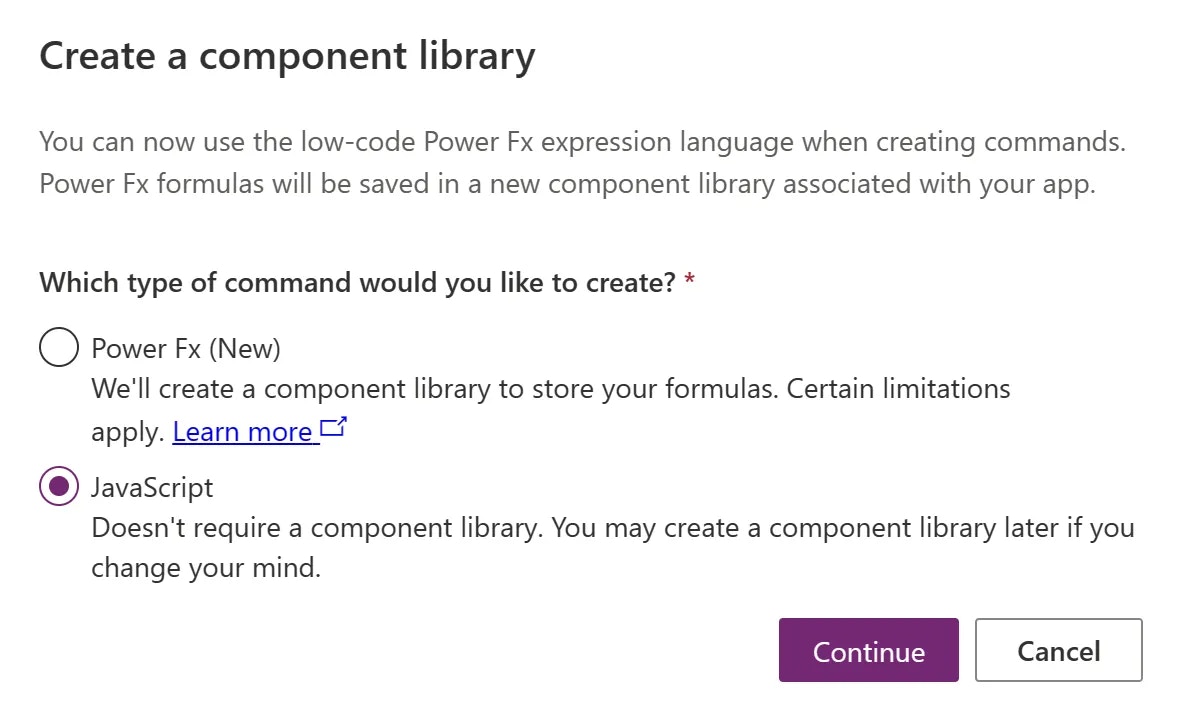 5. Fill in the details you copied from the published flow
 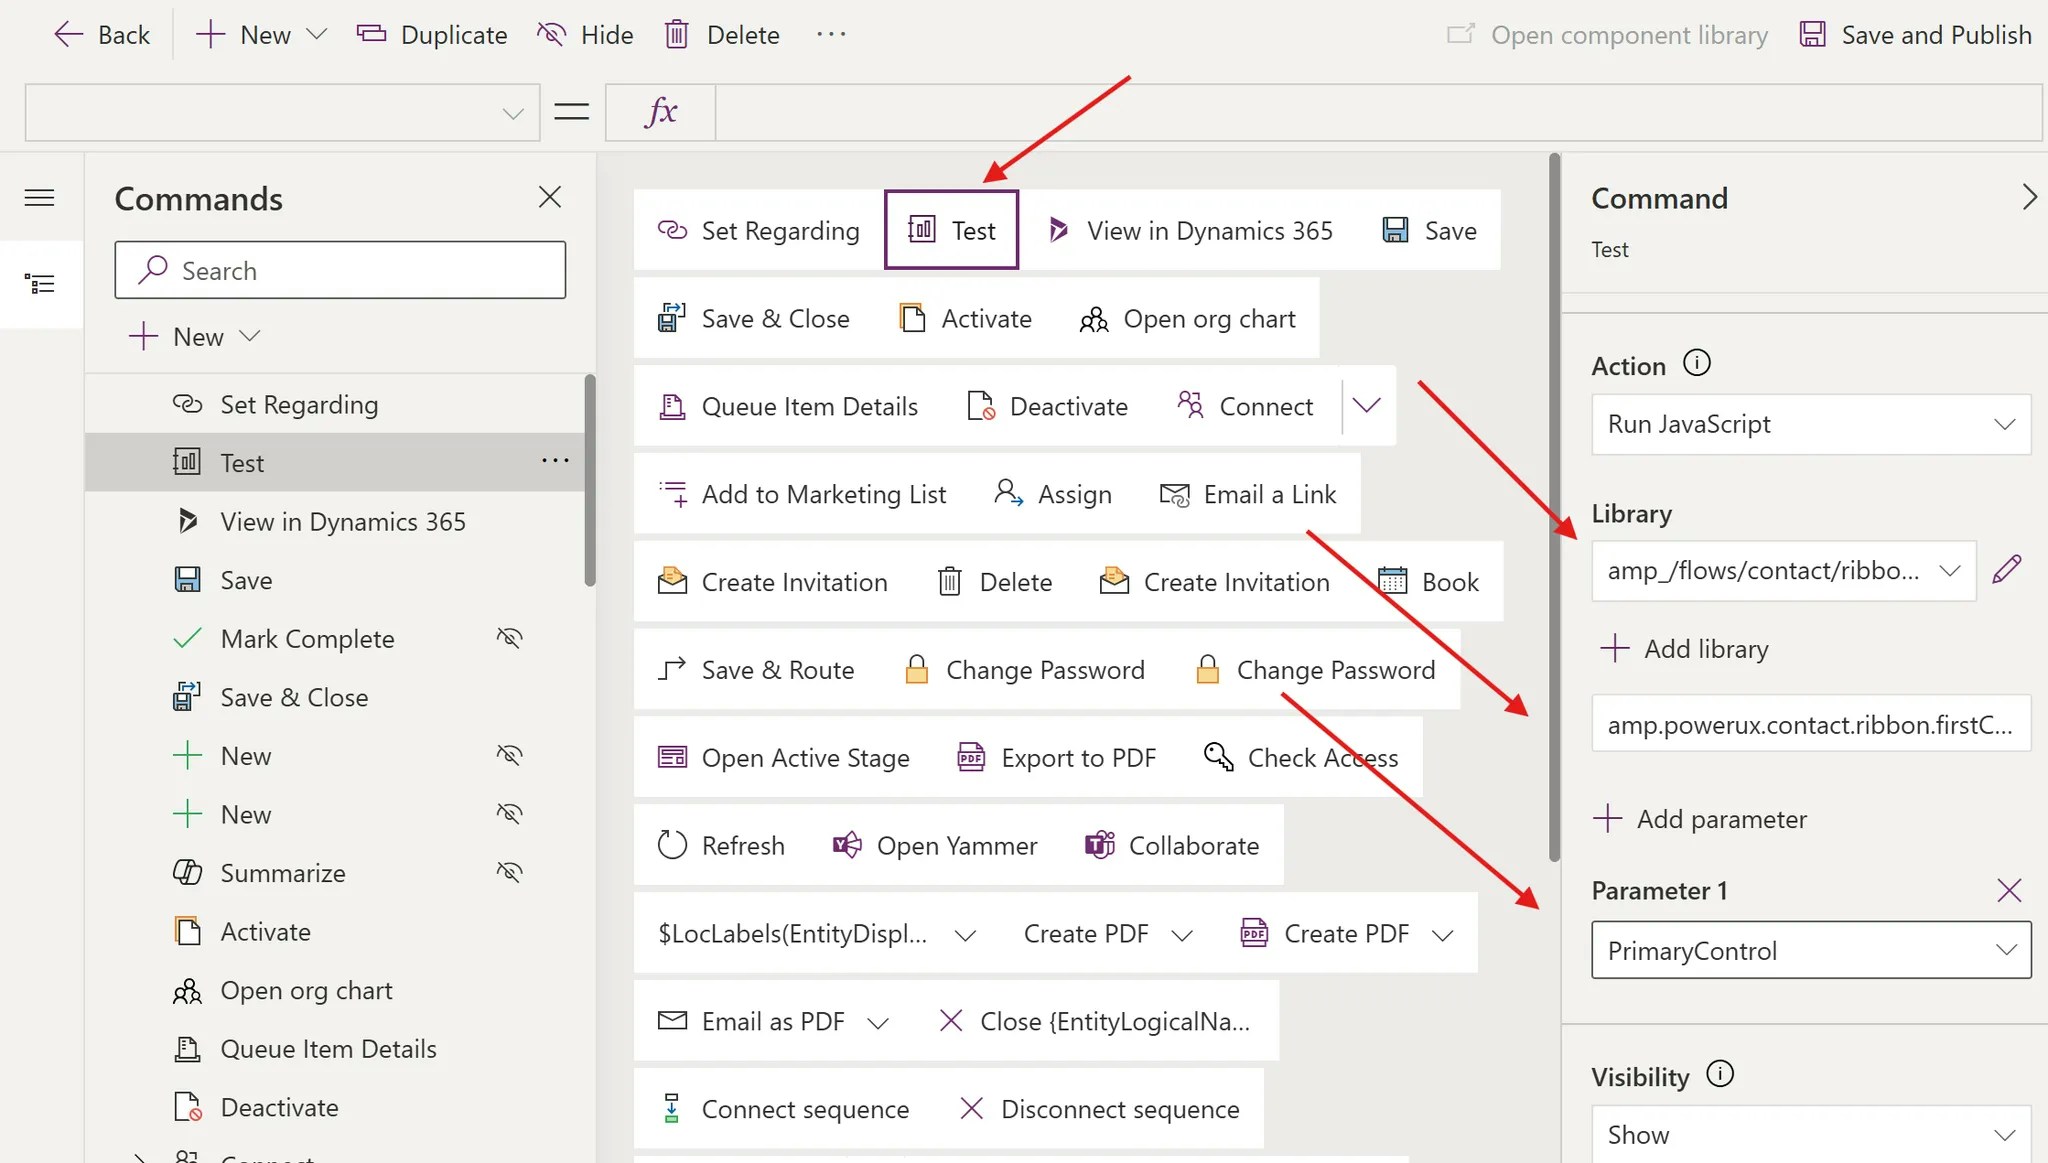 **Library**: Copy it from the `library name` of the published flow
**Function**: Copy it from the `function` of the published flow
**Parameter**: pass the `Primary Control` as the first parameter
6. Save & Publish
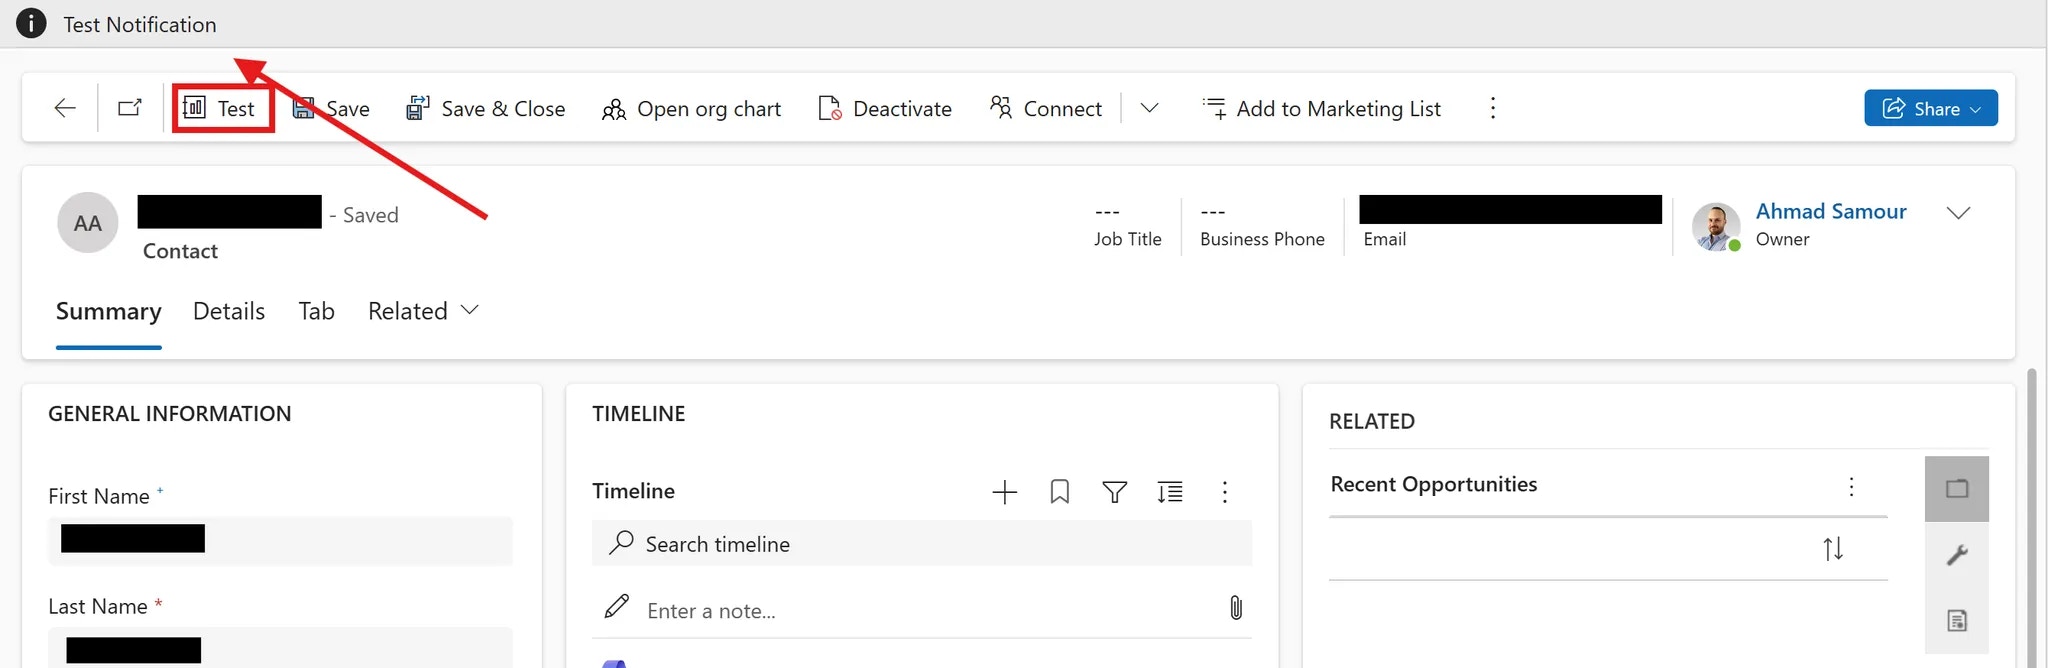
Observe the result after clicking on the button
**Library**: Copy it from the `library name` of the published flow
**Function**: Copy it from the `function` of the published flow
**Parameter**: pass the `Primary Control` as the first parameter
6. Save & Publish
Observe the result after clicking on the button